How to Cook Food Over a Campfire
Campfire Cooking Tips and Tricks
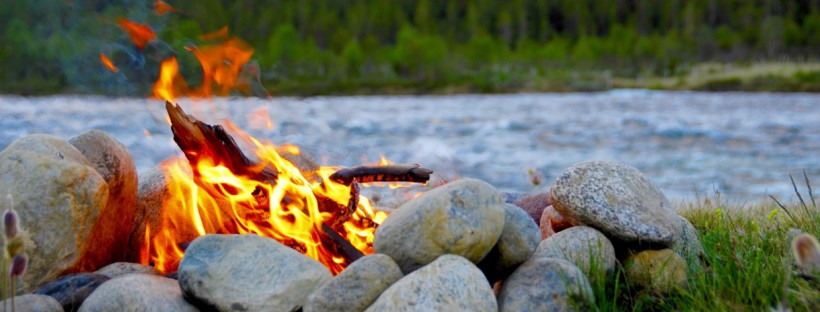
One of the best parts of a camping trip is gathering around a fire with family and friends to enjoy a campfire-cooked meal. What could be better than the sound of crackling wood and the aroma of dinner in the works?
They are simple, yet effective, tips for making sure that cooking for the campfire goes well.
What is best to cook with?
Use the pointers below to help make cooking in the outdoors less daunting, and more fun.
Fire or Stove
Nothing beats a classic campfire when it comes to cooking outdoors. First and foremost, you will need some newspaper/cardboard and a box of matches or long handle lighter. Having the option to cook over an open flame or wait until you have coals is so worth it. Listening to the wood crackling and popping is the best. Now if you are camping in a dry zone and fires aren’t allowed or you may run into issues if you’re camping in a wet climate area, damp wood can make it much harder to start a fire unless you bring your own wood. The next best thing is a camp stove or your RV stove, They are reliable, can be used in wet conditions and during fire bans.
Cooking Supplies
The true necessities are coffee percolator, a medium to large lightweight pot, a frying pan of similar size, heavy-duty aluminum foil, can-opener and a portable grate that can be placed over a fire pit. This combination of cooking equipment can be used to prepare just about anything from coffee, bacon and eggs to hot chocolate, beans and pasta. Roasting sticks will be essential for hot dogs, smokies, corn on the cob and marshmallows. Lastly, don’t forget your heat-resistant spatula, long-handled spoon, flipper and tongs as well as heat resistant cooking mitts. Why? Stirring or pulling food off a fire bare-handed is far from pleasant!
Food Prep
The more prep work you do at home, the less chaotic your camping trip will be. Cut, chop, marinate and label your food ahead of time. If you enjoy adding a little seasoning or spices to your meals, try this Buy a bag of multi-coloured drinking straws, Use a lighter and seal one end of the drinking straw with the flame. Do this VERY CAREFULLY – SHOULD ONLY TAKE A SECOND OR TWO. After the straw cools, fill with your desired spice. Seal the other end of the straw and label it. When you are ready to cook, snip off the end of the straw to release the spices and you’re ready to get cooking.
Pack up to go
When it is 30 minutes before you want to pack up all the food, you’ll want to let your RV fridge &/or cooler chill with ice in it, your food will stay cool longer. Freeze your drinks like juice boxes and some water bottles, and they will act as ice packs and save some space. Remember when packing a cooler, pack the items you plan to eat first at the top, this will minimize digging around or what you need and help the ice last longer. Freeze-dried meals are ideal when you may need something quick or to save on space. Just add hot water into the pouch.
Building the Perfect Campfire to cook with…
Ok, Ready to get started? Campfire cooking is like nothing else in the world. Imagine spending a day hiking or swimming, building a fire and cooking a meal surrounded by nature. Campfire cooking with friends and family is a wonderful experience.
It’s time to build the perfect fire. The perfect fire involves burning seasoned wood until it turns into coals for even cooking. Seasoned or dried wood just means all the moisture has been removed from the wood. Most campgrounds have seasoned wood and pre-built fire pits for guests to use. You will need tinder ( something like cardboard or newspaper or dry leaves, grass, bark and wood shavings all work well too ). An axe will be helpful in order to make kindling. Kindling is essential when starting a fire. Good practice is to always have extra tinder and lots of kindling than you think you’ll need; it burns quickly and if you run out early on, you’ll have a hard time getting the fire going.
Many campgrounds do not allow removal of underbrush for fires. If you have got the space, and are not really handy with an axe, buying bags of pre-cut kindling from a hardware store may be a good option for you.
Build your own campfire area. If no fire pit is available, but fires are allowed, have fun and build your own, choose a level spot that is free of grass, tree roots, loose dirt and any other hazardous or flammable debris. Also, most importantly make sure there is no trees or branches above that the flames could reach. Find some large rocks or green logs ( not seasoned or dry ) to make a circle and that can be your campfire pit area.
Build the fire.
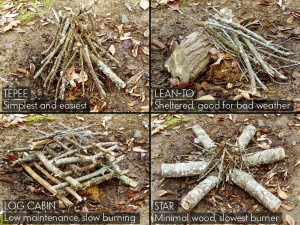
Place the tinder first, fill the center area of the fire pit. Next, gather your kindling or small dead branches and create a tepee or lean-to type pattern on top of the tinder. Now it is time to light your campfire. You’ll want to light the tinder as close to the center as possible. Using\ a wind-resistant, long-neck lighter is ideal for getting directly to the tinder. Once your fire is going, it’s time to build it up. but remember to build it up slowly and steadily.
Keep these in mind when using a campfire… Always have your firepit at least 10 feet away from anything, trees, tents, RV, etc. Always keep a bucket of water or sand nearby to extinguish the fire. Once the flames die down, stir the ashes and pour water or sand to cover the ashes completely and make sure cool to the touch. Watch the weather, wind or rain – storms are not a fire’s friend.
5 Rookie Mistakes to Avoid When Cooking over an Open Fire
Here are five pitfalls to avoid when cooking over an open fire this summer and some tips to try.
1. Not being prepared. Don’t rely on the campsite to provide dry wood and a camp grill. Prepare as many of the ingredients ahead of cooking as possible. If you chop vegetables, mix sauces, make baking mixes before you leave home, you can spend more of your cooking time tending to the fire.
2. Being impatient. A good fire for cooking is primarily hot coals and just a few logs of burning wood. Depending on the fire and weather conditions, a new campfire can take 30 to 45 minutes to burn down to the right conditions. Let the fire burn down a while before you cook over it. A bed of glowing coals is ideal for roasting.
3. Adding all the wood at once. Build a small starter fire with kindling and smaller logs of wood. Let this burn for at least 30 minutes, adding some larger pieces of wood as needed. This will give you a nice, warm base of coals and plenty of direct heat when you’re ready to cook. It also ensures you’ll have plenty of wood to burn throughout the evening.
4. Cooking directly over the flame. Build a fire on one side of your fire bowl, fire pit, or fire ring, and use the other side as a place to move hot coals. Then you can place a camp grill directly over the fire to boil water, roast meats, and grill vegetables. The hot coals can be used to cook vegetables in aluminum foil packets or for baking cobbler in your Dutch oven camp stove.
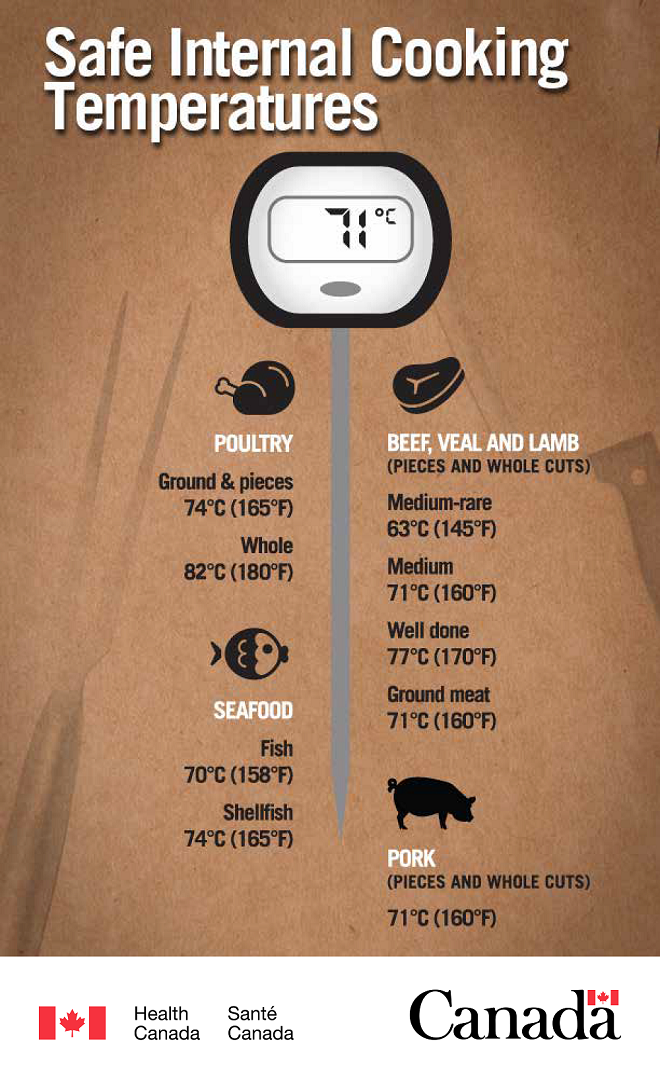
5. Cooking the food for too long. Plan to remove your food from the grill just before you think you should, and give it plenty of time to rest off the heat. Remove large pieces of meat, such as steaks or whole fish, about five degrees below their target temperature. Cover the meat with foil and rest for five to 10 minutes before slicing. A digital probe thermometer is a must-pack for campfire cooking.
Learn safety tips for all food types.
Safe Internal Cooking Temperatures